
It aims to assist users in correctly choosing the appropriate product and being able to get started easily after purchase, giving full play to the various functions of the product and enhancing the user experience.
I. Pre-Purchase Guide #
Product Series Description and Comparison #
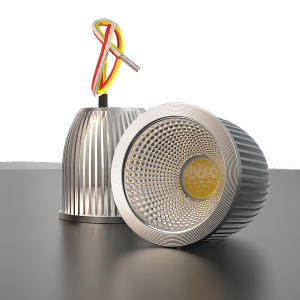
TILLUME’s on-sale PWM 24V LED Spot includes the Expert Series and the Master Series. Suitable for low-voltage PWM LED controllers and actuators in DALI, KNX, and DMX devices
The expert series #
It is mainly designed for regular usage scenarios. Its silver radiator features a simple and practical design, supports PWM dimming technology, and has a line loss compensation function. It can still ensure stable brightness output under certain low input voltages, meeting daily lighting needs.
The master series #
It is a comprehensive upgrade based on the expert series. Not only has the radiator been optimized, with a significant increase in the heat dissipation area and an improvement in the heat radiation intensity to ensure the long-term stable operation of the lamp, but the COB light source has also been upgraded. The color rendering index (CRI>90) standard – equipped in the expert series has been increased to CRI>95, and the spectrum has been upgraded to a sunlight-like spectrum, effectively reducing blue-light hazards and better-protecting eye health, bringing users a higher-quality lighting experience.
Series Comparison #
| Expert Series | Master Series | |
|---|---|---|
| Wires Loss Compensation | Yes | Yes |
| PWM Available | Yes | Yes |
| Heat Dispersion | Good | Very Good |
| Overheat Protection Circuit | Yes | Yes / double protection |
| Maximum Input Current Limit Function | Available for some products | All items’ configuration |
| Spectrum | Conventional LED spectrum | Similar To Sunlight Spectrum |
| CRI | >90 | >95 |
| Max. Power Option | 8W | 10W |
| CCT Option | Single CCT/ Tunable White / RGBW | Single CCT/ Tunable White / RGB/ RGBW |
Product Selection #
Purchase Notes #
II. Installation Guide #
Unpacking Checklist #
Basic Function Checklist #
Safety Tips #
24V LED Spots Safety Checking List
- Heat dissipation Space Requirements
When installing LED Spot, it is necessary to consider reserving heat dissipation space to reduce the operating temperature of the LED and indicate its service life

- Turn off the Power Supply
Although the voltage of our spotlight products belongs to Safe Voltage and there is no risk of electric shock, there is a certain risk of surge voltage at the connection point when live wiring is used, which can sometimes damage electrical equipment.
- Check the reliability of wire connections
Terminal blocks are recommended for connection. If the terminal is located at a node of a branch, please confirm the current of the entire branch to ensure that the terminal meets the maximum load limit.
For example, if a total of 10pcs 8W LED Spots are connected to the entire branch line, the total power is 80W, and the current flowing through the branch line terminals is 80W ÷ 24V=3.33A. Considering the service life and the deviation between the calculated value and the actual value, a margin of 20% -50% is reserved. The terminal with a rated current of 6.66A should be selected here - Ensure correct circuit polarity before Turn on the power
TILLUME LED Spot has input line identification printed on the packaging box, please check it. When wiring inside the house, Users should mark the lines to prevent misconnection.
Tip: Due to the common two cores cable colors in the market being blue and brown. The colors of the three cores cable are blue, brown, and yellow-green. For a two core wire, since brown is close to red, we can define it as 24V+, and then blue is defined as -. For three core wires, brown is close to red, defined as24V+, blue is close to cool white, defined as CW -, and yellow-green can be defined as WW- - Check again if the wires have sufficient load capacity
Please refer to —> Specification Table for Current Carrying Capacity of Electric Wires
- Maximum and minimum input voltage power warning
If the input voltage exceeds 30V, it will cause irreversible damage to TILLUME 24V LED Spots. If users use adjustable output voltage, please pay special attention to whether the input voltage of their LED Spots is within 23-24V. The specific model of the product has a slightly different input voltage range. Please refer to the product technical specifications
Tips: It is best to set the input voltage at the rated voltage of 24V for optimal performance
Step-by-step installation instructions #
- Tool preparation list (users are required to prepare their tools)
- Installing the fixture
- Installing the spot into the fixture
- Function test process
III. Daily Use And Maintenance #
General instructions #
Notes: Common controller configurations are under construction
Safety Warning #
- When the temperature of the light source exceeds 50 ℃ during operation, please ensure that the LED spot stops working for more than 15 minutes when disassembling.
- Although the working voltage of 24V LED Spot is safe and there is no risk of electric shock, the short circuit problem is caused by improper proportional operation, please power off the power
IV. Troubleshooting And After-sales #
Troubleshooting FAQ Quick Check Sheet #
1. Confirm whether flashing occurs on the same circuit. If so, please check if the LED controller or actuator is working properly. The entire circuit can be disconnected from the controller and directly connected to a 24V power supply. If it is normal, the fault can be determined to be caused by the controller. Attention: Models with power balance limitations can only be verified with one channel.
2. If some spotlights in the circuit are flashing, please confirm whether the flashing spotlights are located at the farthest end of the power output. If the input voltage meets the requirements with a multimeter, if the input voltage is normal, the LED Spot may be damaged. Please investigate whether it is caused by insufficient heat dissipation space and Please contact our after-sales service for free exchange
1. If the LED Spot flashes at a speed of approximately 2-3 times per second, the problem may be due to insufficient power supply or actuator. Please reduce the number of LED installations or replace them with larger power supplies or actuators.
2. If rapid flickering occurs during dimming, please increase the dimming frequency of the actuator or LED controller. We recommend it to be above 1KHz. After increasing the frequency, the fault has not been resolved. Please replace the controller and actuator for testing, or consult the controller manufacturer.
3. Exclude any issues caused by EMC interference. Ensure that there are no high-power interference sources in the circuit, or reduce the area of the controller and LED Spot wiring circuit.
1. Reduce the dimming frequency of LED controllers or actuators
The flickering at extremely low brightness is usually caused by the matching of the controller and LED Spot. You can try connecting the LED strip to confirm if there is the same problem. If the fault is eliminated, it means it is an incompatible issue. Please contact us promptly. We will update the compatibility issue to our database.
2. Check if the input voltage is too low. If so, adjust the output voltage of the power supply to compensate. Or replace the cable with a larger specification to reduce the impact of line loss


